Project: Home Galleria

Merry Christmas everyone!  I decided to take a break from playing with all my new cool Santa gifts and instead put a check mark next to this month’s to-do item.  Unlike most of my projects, this one is hot off the “reveal” night.  Note, the emphasized reveal word was purposely used to keep from misleading you into thinking this was a quick project – nothing of sorts.  I almost called this project Massi Procrasti because of the amount of time that passed since starting this project.  In fact, it has been so long I absolutely forget how long it has been and can only guess it is upwards of 1 to 1.5+ years in the making.

Project Home Galleria

It all started as a result of a slight case of OCD that I’ve battled since childhood.  Normally it is kept in check but I allowed my wife to hang our photography pictures on a long wall facing into our great room.  Hanging is a scientific, highly mathematical and sometimes requires massive engineering (link here and here).  Unfortunately, my wife doesn’t have those same convictions, her mantra – eyeball it, smack it, hang it, admire it.  I might have been able to struggle through her output better had that wall not led directly into our master bedroom – yes, at least twice a day my alarms would blast forcing me to muster everything I had to dampen it below eruption levels.  For the legal papers it should also be stated that she recently took to purposely tilting the pictures – feel free to ask her to explain herself in the comments!

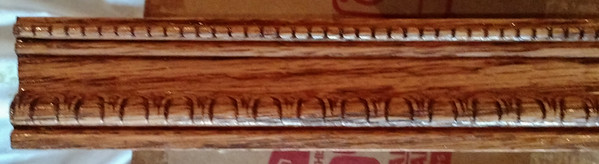
Like I said, 10’s of months back the inner voice told me to rid myself of this daily stress.  That spark initiated a trip to Menards in search of some nice trim molding.  Hours of searching later this specimen revealed itself.  Note, I couldn’t find the original progress shots so these were taken during the build and finishing stages that were completed recently – these trim pieces were not stained or finished.
Project Home Galleria

Hit the jump to see how this project came together!

Continue reading Project: Home Galleria

Project Chiro: Posey Gets a New Spine

Time for another update on the Posey Project.  If you recall form the last post on version 3.0 (link here), the big change was to introduce the new joint made out of chain link fence caps.  That was definitely a break through moment in the project and my gratitude still goes to the individual that was referenced in that post as the spark.  To be honest, the modification that became version 3.1 was really a result of designing and building this latest version which I refer to as V4.0.  Here is the latest version all dressed to kill!

Posey V4.0

Of course you can’t tell the details with the costume on, so let’s take that off and see what tweaks we have to show in this version.  First off you will see that I stuck with the same chain link fence cap joint model detailed in V3.0.  That is the go to joint for now due to being sturdy and easy to position – thanks again to the individual that sparked the concept.  I do keep my eyes open every time I’m in a hardware store just in case something else will catch my eye – if I could shrink the overall length of the joint down it would be beneficial for a number of reasons.  One area that is completely different is the backbone design.

Posey V4.0

Hit the jump to see the design details and a few more shots

Continue reading Project Chiro: Posey Gets a New Spine

On the Trail of Oregon

Ahhhh, my first day of the holiday season vacation!   Of course, this just means I swap career work items for honey do work items but it sure feels great to be able to sleep in a bit.  Knowing all the things I have to get done over this break, figured it would be prudent to get some December posts out of the way.  So, I bring you today’s featured feathered friend.
Oregon Junco - Nevada

I took this while out hiking the Red Rock Canyon in Nevada (outside of Las Vegas).  We’ve been there a couple of times now and based on the previous posts and some that are still in the hopper, I must say it has produced a surprising number of checks in the bird list – add in the marks gained from Henderson and Nevada has been very very good to me – they obviously have better wildlife than they do politicians.   For those not aware, this particular specimen comes from the Dark-Eyed Junco family.  Their long black hood is pretty distinctive in the birding arena.  The Dark-Eyed Juncos have been featured on the blog a number of times now (links here, here and here).  Because of they are relatively common (they show up in droves here every Winter).  I usually don’t get too excited about capturing them but as a rule, “never pass up a bird shot”.  Once again this principle has likely led to a new mark in the bird list.

Oregon Junco - Nevada

If you look at the specimens in the links above or live in the Midwest you are familiar with one variation of the Dark-Eyed Junco – the Slate Colored group.  They are aptly named in that they are pretty much dark gray colored from head and top feathering through to the tail. Typically they have a white underbelly with some variation in gender.  There is a White-Winged group, a Gray-Headed group and a Pink-Sided group to name a few, but none of those variations have the distinctive executioner hood.  It is this specific feature that led me to the determination that this is an Oregon group Dark-Eyed Junco.

Hit the jump to see a couple more pictures of the Junco (a different one to be specific) and learn a few facts about this little bird.

Continue reading On the Trail of Oregon

Project Bob Marley: Posey Gets a Better Joint

I hoped you like the previous Kestrel posts – always exciting when I can add a mark to the bird list.  It is also exciting when I can talk about a new revision in the Posey project.  The last time we delved into this addiction.. I mean project we were discussing the desire to add flexibility to the PVC structure (link here).  That resulted in revision V2.0 of the PVC Halloween Decoration Project.  If you recall, we leveraged eye bolts to create the joints in V2.0.  That achieved the desired ability to move the arms and legs into just about any position I wanted.  The issue is the structural stability of the eye bolts .. as in .. not that stable.  One long night on Pinterest (yeah, I said it) looking through board after board on the home haunting groups I discovered an excellent idea from someone that goes by Beelce on the Haunt Forums website (link here).  That idea looked like the perfect answer to my stability problem and immediately rushed out to Menards the next day.  Sure enough, they had 1″ chain link fence caps that matched the ones shown on the forum so bought every one they had – like 30 of them. After some trials and errors I am proud to present V3.0 of Posey!

NOTE: I did make some late updates to this model which I added to the end – please check that out since the modification uses less materials – that version is now being referred to as V3.1
Posey 3.0

This version is 100% more stable than the eye bolt approach and the joints work exactly the way I was hoping.  As with all my projects, let’s give some details.  Again, thanks to Beelce for providing the catalyst and the basis for even more versions – my  motto: embrace and extend.  First off, the hardware list.   Note, this version was built with chain link fence caps from Menards.  They hold a much better tolerance on their 1″ dimension but their connecting hole is 1/2″.  I recommend getting the fence caps from Home Depot instead.  They are a penny cheaper and have 3/8″ connecting holes instead so you save on hardware.  They do have a lot of variance in their 1″ dimension which oddly enough turns out to be an advantage in upcoming versions (more later on that).

  • Drill Press (technically optional, but highly recommended) if not, can uses a standard drill)
  • 1/8″ Drill Bit or whatever size fits the screws you are going to use to affix the chain link cap to the PVC
  • Pilot hole drill bit – smaller the better
  • Screwdriver – manual or electric to put the caps in
  • (16) Chain link fence cross bar caps w/ 3/8″ hole ($0.88)
  • (8) 3/8″ Large Washers ($3.78 – 100)
  • (8) 3/8″ x 1″ Bolts ($4.21)
  • (8) 3/8″ Nuts ($2.28)
  • (8) 3/8″ Split Washers ($2.00)
  • (32) 1″ cabinet, drywall or round head screws (use whatever you laying around that is in the 1″ long range)
  • Two Socket Sets
  • PVC Cement (optional)
  • Duct tape – preferably white
  • Hand PVC Cutter (optional, but highly recommended)

Next the materials list:

  • (3) 1″ PVC Cross ($2.15)
  • (4) 1″ PVC Caps  ($0.45)
  • (9) 1″ PVC T’s ($0.59)
  • (4) 1″ PVC Couplers ($0.41)
  • (10) 1″ PVC Elbows ($0.50)
  • (1)  3/4″ PVC Cross  ($2.37)
  • (1) 3/4″ PVC T’s ($0.45)
  • (5) 3/4″ PVC Elbows ($0.25)
  • (1) 3/4″ PVC Cap ($0.19)
  • (1) 1″ to 3/4″ Reducer  ($0.77)
  • (1) 10′ x 1″ PVC Pipe (depends on size but by two, if you are like me you’ll be making a lot of them) ($2.48)
  • (1) 3′ 3/4″ PVC Pipe (basically just enough to build the head) ($1.50)

Hit the jump to see how to build this version of Posey!

Continue reading Project Bob Marley: Posey Gets a Better Joint

Reaching for a Kestrel

Hope your holidays season is going well for those who take part in the festivities.  Things are winding down at work, well, let’s put it in a more accurate manner – my workdays are coming to a close this year but work is definitely not winding down and 2015 is looking to be back on the SAP roller coaster once again.  As for now, I’m enjoying taking the last of my vacation days and thought I’d spend a bit of that working on the blog quota.  As mentioned previously, I have a number of posts in the queue in the Halloween decoration arena and thanks to an awesome recent gift from my brother looks like I’ll be adding additional chapters to that project – more to come!  I try to keep a variety around here, and therefore weaving in other topics among Posey posts.  In that vein I give you a bird that has a history of taunting me.

K

This bird of prey may be small in stature, but what it makes up for in size is more than compensated by its elusiveness.  For those not familiar with this ornately colored bird it is the American Kestrel.  Living out in the country I have the benefit putting eyes on these cool birds fairly often.  Typically they are spotted hanging out on a high overhead wire or on top of a tall sign.  Whenever I’m driving I’ll routinely scan those areas looking for a solitary bird staring intently at the ground.

Kestrel

Hit the jump to see and read more about the Kestrel.

Continue reading Reaching for a Kestrel

Project Steve Austin: Taking It To The Next Level

Since I was called out last month for getting such a late start on posts, figured I would try to crank one out a little earlier this month.  Besides, it is Dog Show weekend which means I have plenty of spare time for a change.  Today’s topic is really a multi-parter chronicling a slight obsession (as Linda puts it – I refer to it as enthusiasm) with a Project I documented around Halloween (link here).  If you recall, the topic at hand was a new idea for decorations based on putting costumes on a PVC structure.

Killer Clown

This was another effort focused on bringing more scare into the Haunted Trail.  I now call this Posey V1.0 which essentially consists of a fixed posture.  If wanted to change the pose I would have to break the existing connections and make another pose by using different connectors.  The drawback being the pose was limited to what I could create with a limited number of angles (90 and 45 being the core angles available).  Granted you can do a lot depending on how you combine those but just seemed limiting.  This deficiency got me thinking and when I get to thinking… interesting things can happen.  Ladies and gentlemen, I present to you …. drum roll … Posey V2.0.
Posey 2.0

Hit the jump to see how to make this version of Posey!

Continue reading Project Steve Austin: Taking It To The Next Level